Explainer Studio guide · 9 min read
How to make an animated explainer video with AI
A complete walkthrough for turning a topic into a narrated, animated 1080×1920 explainer: choose a topic that works, describe it, approve the script, polish the scenes, pick the look, voice and music, then record it on a computer or a phone and post it.
An explainer video answers one question in a minute or two: how does Google Maps pick a route?, why do airports want your laptop out of the bag? Explainer Studio writes the script, draws and animates every scene with diagrams, maps and characters, adds a voiceover with word-by-word captions and music, and lets you record the finished vertical video in your browser.
You stay in charge of what it says: you read and change the script before anything is drawn, and you can change any scene afterwards by chatting or by editing it yourself. Trying a sample is free; writing your own idea uses your own OpenAI API key, billed to your OpenAI account.
This guide goes through every step in order. To see what the finished scripts look like, read the samples, such as How Uber Finds Your Cab So Fast, or find topic ideas on the explainer video maker page.
Step by step
-
Choose a topic that works as a video
The best explainers answer one clear question with one example you can see. "How does Google Maps find the fastest route?" works because it can be drawn as a small city grid with cars; "Everything about maps" doesn't. Before you start, decide: the question, the example to animate, who it is for (kids, teens, adults) and roughly how long (30 seconds for a puzzle or fact, 1–2 minutes for how something works).
Tip: Good topics: how something works, why something happens, a story or fable, a brain teaser, top facts about one thing.
-
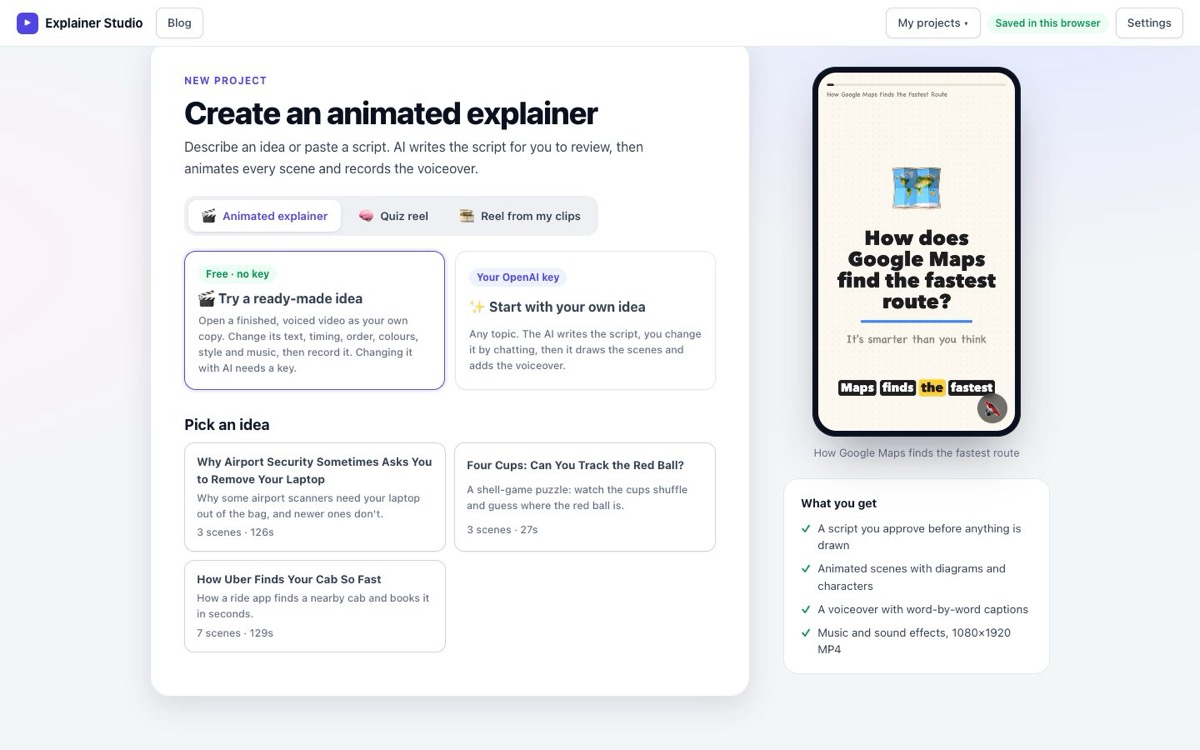
Open the studio and choose how to start
Go to whatshotai.com and press 🎬 Create an animated explainer. You get two ways to start:
• Try a ready-made idea (free, no key): open a finished, voiced video as your own copy and change its text, timing, colours, style or music.
• Start with your own idea: the AI writes a new script from your topic.Tip: New to the studio? Open a ready-made idea first. It walks through every step below without needing a key.
-
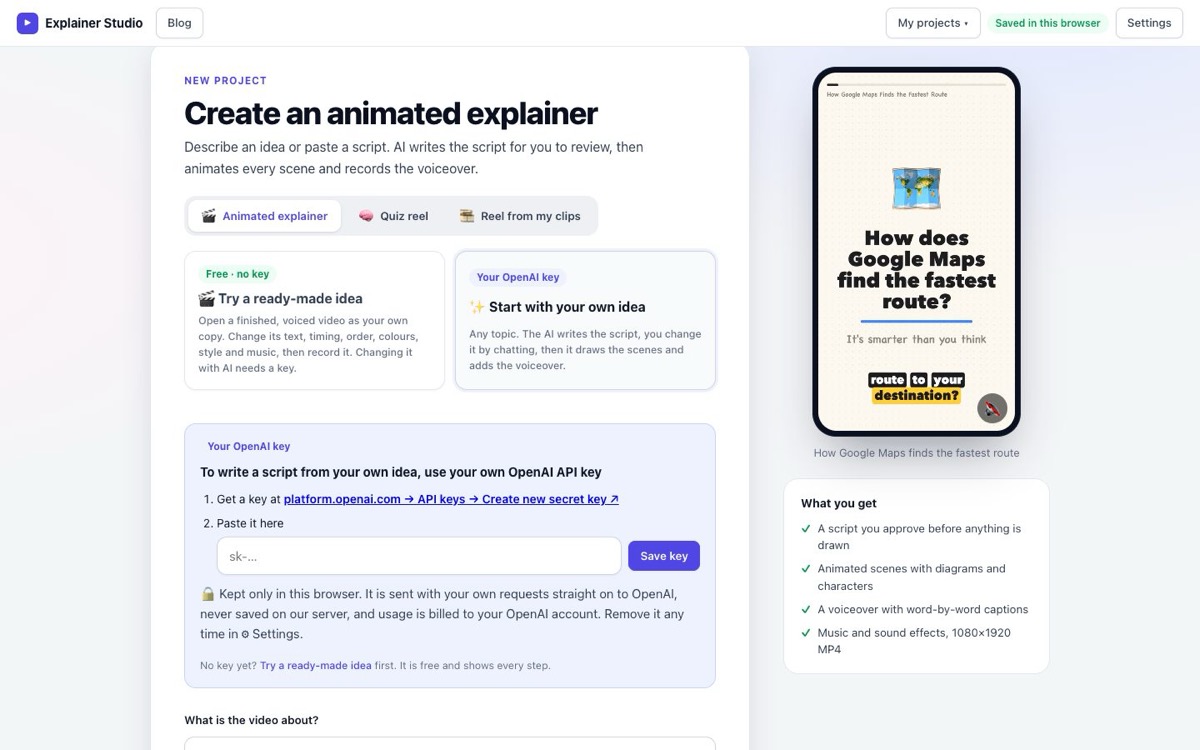
Add your OpenAI key (only for your own idea)
Start with your own idea asks for an OpenAI API key. Create one at platform.openai.com/api-keys → Create new secret key, paste it and press Save key. The key is kept only in your browser and sent straight to OpenAI with your own requests. You can remove it any time in ⚙ Settings.
-
Describe the video
Fill in the create form:
• What is the video about? A few sentences: the topic, what should happen on screen, and anything to show or avoid. Or switch to Paste a script to use a script you already wrote (or got from another AI).
• Video type: leave it on Auto-detect, or pick one, such as Tech — how it works, Science & nature, Kids' learning, Story / fable, History, How-to, List / top facts or Puzzle. It sets the style of the script and the drawings.
• Audience, tone or focus: for example "For 8-year-olds, playful, avoid jargon".
• Target length in seconds.
Press Enter and the AI writes a script split into scenes, each with the narration and a description of what to draw.Example idea
How Google Maps finds the fastest route, shown as a small city grid with cars and traffic lights. For curious teens. Keep it under a minute and end with a surprising fact.
Tip: Specific beats clever: name the example you want animated (a city grid, a backpack in a scanner, three cups) and the audience.
-
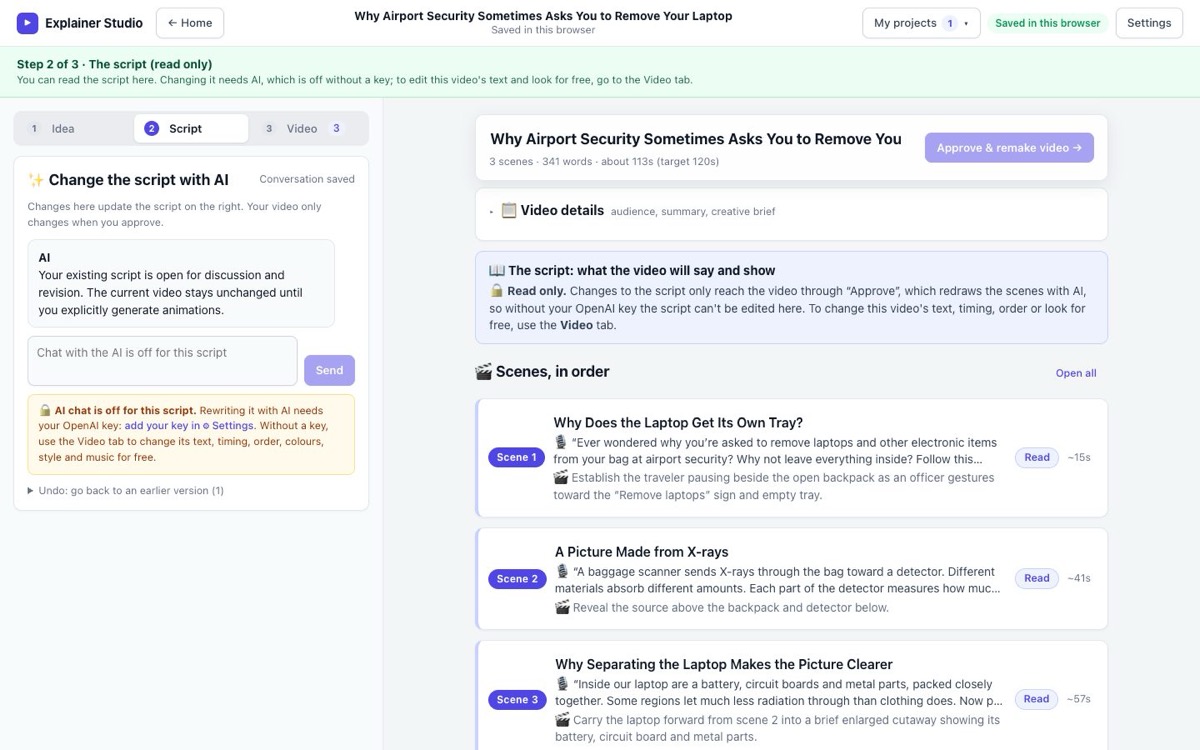
Review and change the script
The Script tab shows each scene with 🎙 what is said and 🎬 what is drawn. Read it out loud: it should sound like a person explaining, not a textbook. Edit any text directly, or tell the AI what to change in Change the script with AI ("make scene 2 shorter", "add a real-life example", "simpler words for kids"). Every change is saved as a version you can go back to. When it reads right, press Approve & make video →.
Tip: Nothing is drawn until you approve, so this is the cheapest and fastest place to make big changes.
-
Polish the scenes on the Video tab
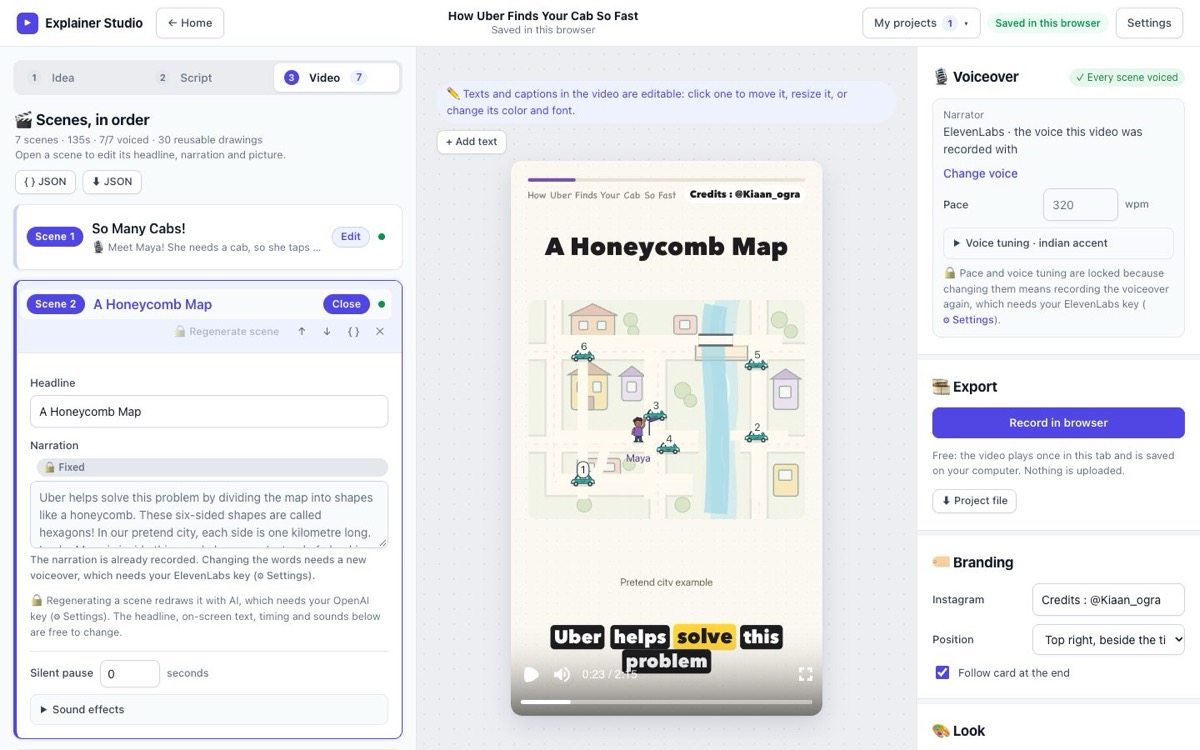
The studio now draws and animates each scene and records the voiceover; the counter shows which scene it is on. The preview in the middle plays the real video. Open a scene on the left to change its headline, add a silent pause or change its sound effects. To change any text in the video, pause the preview and click the text: move it, resize it, or change its colour and font. + Add text puts a new label on the scene. If a drawing isn't right, ask for a change by chatting ("make the cars bigger", "add a map of India") and that scene is redrawn.
-
Pick the look, voice, music and your handle
The right-hand panel holds the rest:
• Voiceover: the narrator and the pace. Signed-in users get free studio voices; OpenAI and ElevenLabs voices use your own key (ElevenLabs can also use your own cloned voice).
• Look: the visual style (Classic, Cartoon, Pencil sketch, Whiteboard, Chalkboard) and the transitions between scenes.
• Sound & music: the sound-effects pack, background music and volumes; music dips automatically while the narrator speaks.
• Branding: your Instagram handle and an optional follow card at the end.Tip: Changing the visual style restyles paper, fonts and captions instantly; the drawings themselves change only when you redraw them.
-
Record the video on a computer
Press Record in browser in the Export panel. Use Google Chrome or Microsoft Edge on a computer: when the browser asks what to share, choose this tab and press Share. The video plays once and downloads to your computer as a 1080×1920 file, ready for Instagram Reels, YouTube Shorts or TikTok. Nothing is uploaded to us. Press ⬇ Project file to keep a copy of the project itself.
Tip: Keep the window large (full screen is best) and leave the tab visible while it records. The studio keeps a list of every video you have made from the project.
-
Or record it on your phone
Phones can't record a browser tab, so on a phone the Export panel shows 📱 Or record it on this phone. Press ▶ Play full screen and start your phone's own screen recorder (iPhone: Control Centre → Screen Recording; Android: Quick Settings → Screen record). After a 3-2-1 countdown the video plays full screen with sound; tap the screen to stop early. Stop the recorder at the end and trim the first and last second in your photo app.
Tip: For the best quality, send yourself the link with Share, open the project on a computer and record it there.
-
Post it as a Reel, Short or TikTok
Upload the video in the Instagram, YouTube or TikTok app. Use the question as the caption (<em>"How does Google Maps know the fastest way?"</em>), choose a cover frame that shows the topic clearly, and add a few topic hashtags. End-of-video questions like "What should I explain next?" bring comments, and comments bring more viewers. A series on one theme (how apps work, science for kids) grows faster than one-off videos.
Questions
Is it free?
Opening the samples, editing text, timing, colours, style and music, and recording are free. Writing a new script, redrawing scenes and OpenAI voiceovers use your own OpenAI key (or an ElevenLabs key for ElevenLabs voices), billed by them. Signing in with Google is free and adds studio voices.
Is there a watermark?
Videos made without an account carry a small “Made with whatshotai.com” mark. Sign in with Google, which is free, and it is removed.
Can I use my own script?
Yes. Choose Paste a script on the create page. The studio keeps your words and plans the scenes and drawings around them.
How long can a video be?
You set the target length. Most explainers are 30 seconds to 2 minutes; shorter videos are watched to the end more often.
Where are my projects saved?
In your browser on this device, under My projects, or in your account if you are signed in. Download a project file to keep a backup.
Which browser do I need?
Recording an MP4 needs Google Chrome or Microsoft Edge on a computer. On a phone, play the video full screen and use the phone's screen recorder. Editing works in any modern browser.